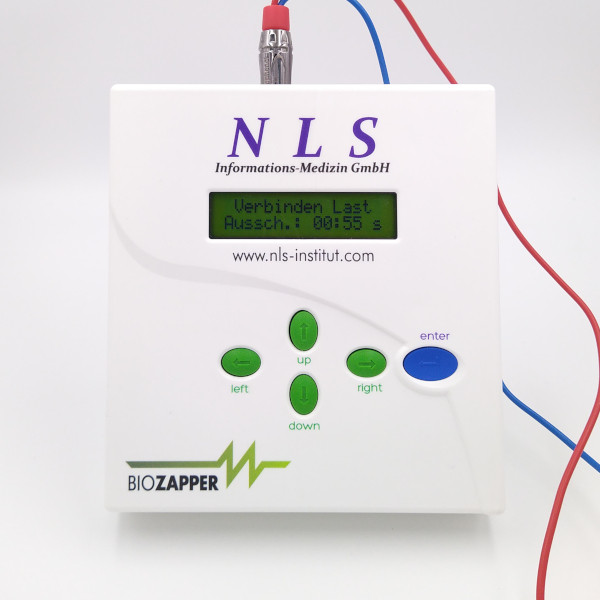
Connection load
Especially for beginners, this display message is confusing. Some even think that the device is defective.
This article aims to explain why this message appears on the display and what solutions are available.
The message " Connection last" is not an error message, but signals to the user that too little current is flowing through the body.
This can have several causes:
- Plug connection not correctly attached
- You are not holding your hands on the electrodes when starting the device
- Too much skin resistance
- Poor electrolyte balance
Check the plug connection
The plug connection between the electrodes and the basic unit is a frequent source of error.
When you insert the plug into the socket, you get an "initial resistance".
Incorrect plug connection

In this position, the unit itself still has too little contact.
As you can see in the picture, you can still see the golden ring of the sheathing and the plug itself is not yet directly attached to the housing.
Correct plug connection

After the first resistance, the plug must be pressed even more firmly towards the casing. Some users are afraid that this will damage the unit, as this requires some force.
Don't worry, with a little force the plug goes into the socket all the way to the edge of the housing. This ensures that the connection is also correct.
Other causes related to this message
- Too much skin resistance
- Poor electrolyte balance
As a rule, this message occurs more often in women than in men. There are two possible solutions for this with regard to the hand electrodes:
- Put damp cloths between the hands and the electrodes
- Use electrode gel (available at any pharmacy), or purchase directly from us, see Onlineshop: Electrode gel
Increase the output strength of the zapper
You have the option of increasing or decreasing the output strength of the device.
By default, the units are delivered with an output power of 30 %. If the above message appears, you can change the output power either via the unit itself or via the software.
Increasing the output power on the unit
Caution: You can only change the output power of the unit if you have started a frequency programme and it is running.

If the programme is running and you then press the UP key, the current output power appears at the top right of the display, in our case 72 %.
You can therefore always increase the preset 30 % in 1 % steps by pressing the UP key until the optimum output power is reached.
Reducing the output power

In the same way, you can reduce the output power by pressing the "Down" key.
Extended explanation of the output power
If you change the output power via the unit, please note the following:
The setting made always affects only the respective frequency programme and the frequency currently running.
Each frequency programme usually consists of several frequencies. Therefore, the selected output power is stored for each of these frequencies. The next time the programme is run, these parameters are stored and it is not necessary to re-enter them.
The reason for this is that everyone has different feelings for frequencies and output power. Therefore, it makes sense not to make these settings in general, but to store them for the individual frequencies.
If you would like to change the output power for one or more programmes at the same time, this can be done more conveniently via the software.
